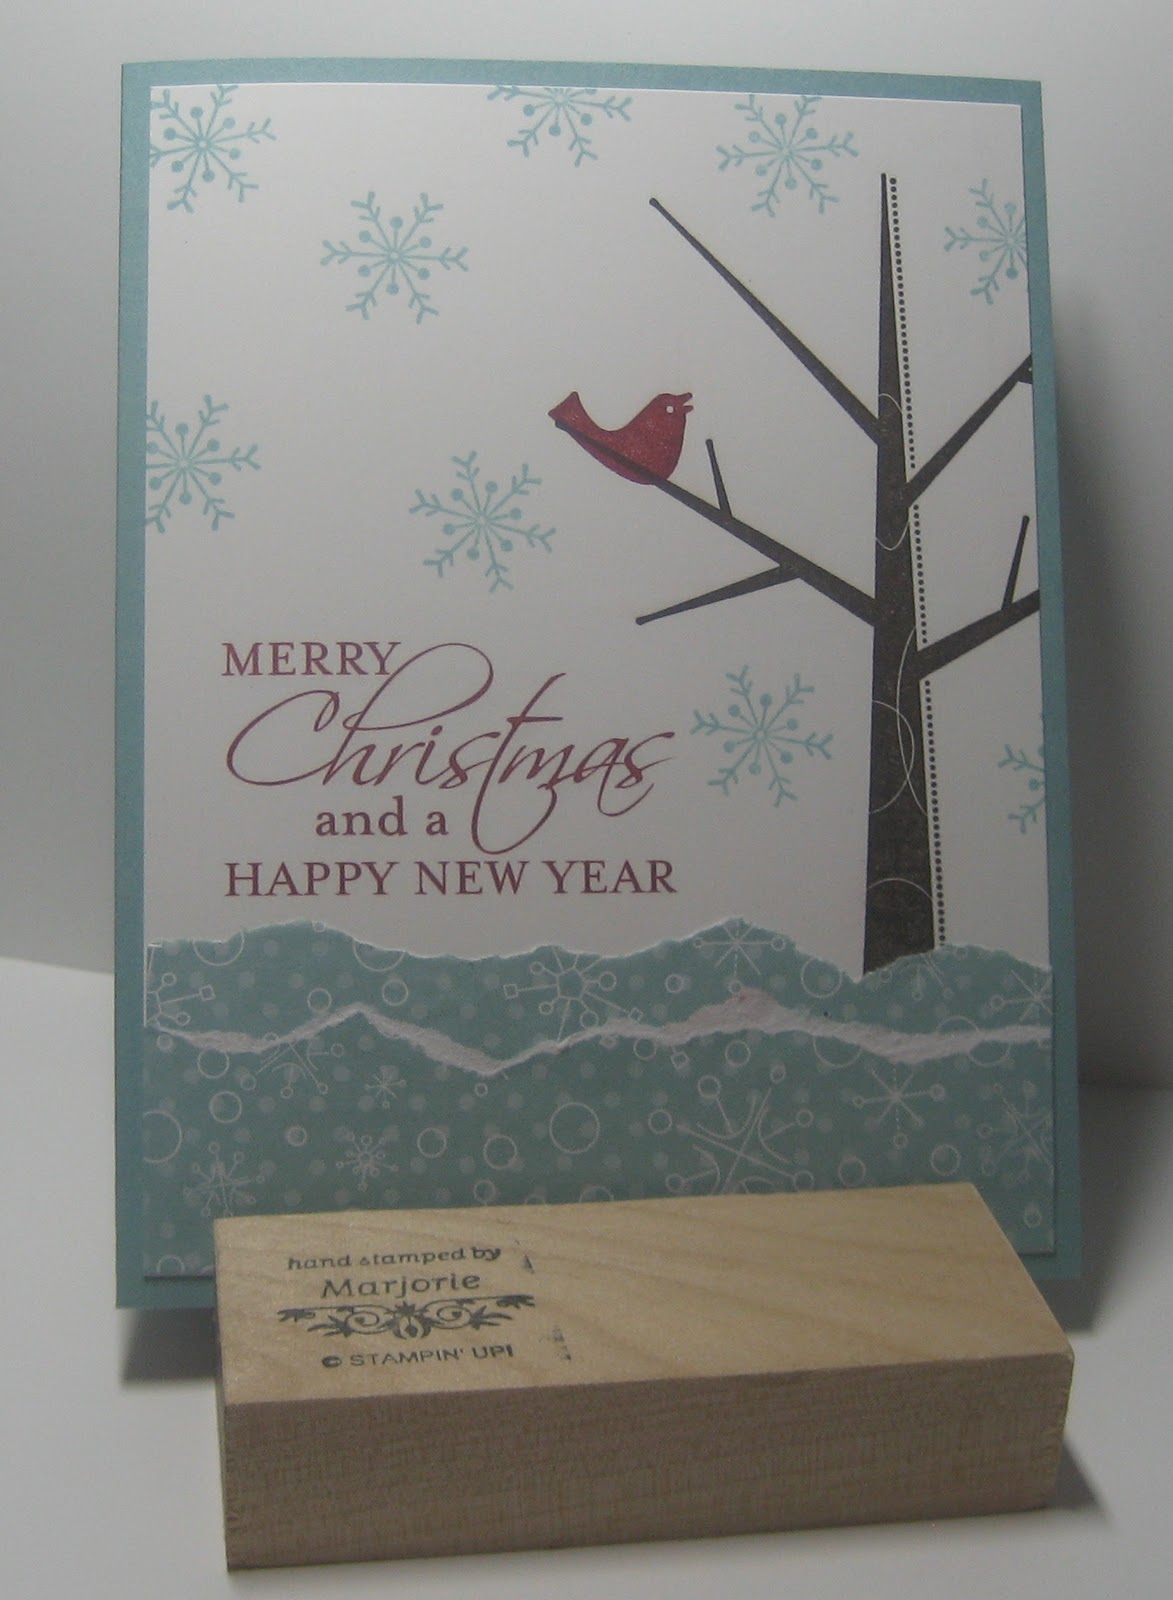
As I said a couple of days ago, I had planned on making THIS card for my playdate with Judy last Monday but ran out of the Cherry Cobbler seam binding. I had already planned next weeks projects so I "lifted" one of them for this week.
I had signed up for Dawn Olchefske's 12 Weeks of Christmas and when I received the week 1 newsletter I instantly knew I had to make at least one - it uses Dasher and the Northern Flurry embossing folder along with Shimmer Paint! What more could you want! You can visit Dawn's blog HERE.
It doesn't show up well in the photo, but we spritzed the image panel with a mixture of Shimmer Paint and rubbing alchohol. We also left off the ribbon in the upper left corner - we actually prefer it without.
Supplies
Stamps - Dasher
Ink - Soft Suede
Card Stock - Soft Suede; Very Vanilla; Real Red
Other - Basic Rhinestones; Shimmer Paint and Rubbin Alcohol; 1/8" Real Red Taffeta Ribbon; Northern Flurry embossing folder
Saturday, December 11, 2010
Friday, December 10, 2010
Peaceful Season and Deck the Halls
This is the second of four cards I did with my sister and my nieces on Sunday. Sherida Giddings had given me one that she had made and knew it would be perfect for our get together. It was really fun to see them working with the Designer Series Paper. Although I used the same side of the paper as Sherida had on both of my cards, some of the others used the flip side and changed the orientation of the card to landscape. I liked the card so much I added it to the "roster" for Judy and I to make last Monday.
Here is the card. Unfortunately Sherida does not have a blog so I can't direct you to the original.
Supplies
Stamps - Peaceful Season (Level 2 Hostess Set)
Ink - Crumb Cake; Cherry Cobbler
Card Stock - Crumb Cake; Cherry Cobbler; Deck the Halls DSP
Other - Two Tags die for the Big Shot; Crop a dile; Jumbo Eyelets; Crumb Cake 3/8" Taffeta ribbon (retired); Linen Thread; Sponge Daubers
We actually did five projects - four cards (2 of each design) and some of the Santa Punch art notepads. Click HERE to see my previous post with the notepads. In addition to the card today and the one I posted a few days ago we made THIS card that I had done with Judy last week. The fourth card was the 3D Ornament card I had posted HERE that I had also planned on making with Judy this week - that has to go on the back burner for now - I lost track of how much of the Cherry Cobbler seam binding I had already used and I had just enough to complete our projects on Sunday.
We had a great afternoon. My sister and her girls made a great lunch; we did our crafts and had a lot of good laughs. We all agreed that we needed to do it more often.
Thursday, December 9, 2010
Faux Shadow Box
Anyone who follows Nancy Riley's blog (iStamp by Nancy Riley) will know that her creativity has had to take a back seat these past several months. Yesterday she was back with a fantastic shadow box project. You can see it HERE.
I knew I wanted to make one, but was housebound and couldn't get out to buy a frame. I wanted to do it right away so I searched around until I found a couple of artist canvases in my craft room. Happily I set to work adapting Nancy's creation to the supplies on hand. I decided to use the smaller canvas - about 8" x 10".
I used the same papers as Nancy but had to reduce the number of squares to accommodate the smaller size canvas I was using. Overall I am really pleased with my version and think it still maintains the "flavour" of the original.
Supplies
Card Stock - Basic Black; Blushing Bride; Naturals White; Garden Green, Real Red; Baja Breeze; Candy Cane Christmas Specialty DSP
Other - Candy Cane Buttons; Line Thread; Small Felt Flurries (retired); Brights Buttons; Two Step Bird Punch; 1/2" Circle Punch; Rhinestones; Rhinestone Brad - Circle Fire; Filigree Brad; Five Petal Punch; Boho Blossoms Punch; Stampin' Dimensionals; Real Red 1/4" Grosgrain Ribbon; Real Red Polka Dot Ribbon (retired); Stickles (nonSU); Sticky Strip; Linen Thread
I knew I wanted to make one, but was housebound and couldn't get out to buy a frame. I wanted to do it right away so I searched around until I found a couple of artist canvases in my craft room. Happily I set to work adapting Nancy's creation to the supplies on hand. I decided to use the smaller canvas - about 8" x 10".
I used the same papers as Nancy but had to reduce the number of squares to accommodate the smaller size canvas I was using. Overall I am really pleased with my version and think it still maintains the "flavour" of the original.
Supplies
Card Stock - Basic Black; Blushing Bride; Naturals White; Garden Green, Real Red; Baja Breeze; Candy Cane Christmas Specialty DSP
Other - Candy Cane Buttons; Line Thread; Small Felt Flurries (retired); Brights Buttons; Two Step Bird Punch; 1/2" Circle Punch; Rhinestones; Rhinestone Brad - Circle Fire; Filigree Brad; Five Petal Punch; Boho Blossoms Punch; Stampin' Dimensionals; Real Red 1/4" Grosgrain Ribbon; Real Red Polka Dot Ribbon (retired); Stickles (nonSU); Sticky Strip; Linen Thread
Wednesday, December 8, 2010
Season of Friendship
It has been quite a long time since I used the Season of Friendship stamp set so when I saw THIS card posted by Patty Bennett I kew it was time to dust it off. I don't have the Seasonal Sentiments stamp set that Patty used, however I do have My Digital Studio and had recently purchased the download for that set. It turned out great! Initially when I selected the stamp, it was very large so I just resized it to the approximate dimensions of the "real" stamp.
My sister and I had planned a stamping afternoon with her two daughters on Sunday so I added this fun card to the "program". The only change we made was to add some Stickles along the edges of the "snowbanks" and in the centres of the snowflakes. My photo does not show that - I took a picture of the wrong one. I didn't want to risk smudging the stickles when I packed up to go home.
So here is my version of Patty's card. We each made two of the card and I have to say that when we all finished there was a chorus of OOH's and AAH's!
Supplies
Stamp Set - Season of Friendship; Seasonal Sentiments (MDS)
Ink - Cherry Cobbler; Early Espresso; Baja Breeze
Card Stock - Whisper White; Baja Breeze; Candy Cane Christmas DSP
Other - Stickles (nonSU); My Digital Studio
My sister and I had planned a stamping afternoon with her two daughters on Sunday so I added this fun card to the "program". The only change we made was to add some Stickles along the edges of the "snowbanks" and in the centres of the snowflakes. My photo does not show that - I took a picture of the wrong one. I didn't want to risk smudging the stickles when I packed up to go home.
So here is my version of Patty's card. We each made two of the card and I have to say that when we all finished there was a chorus of OOH's and AAH's!
Supplies
Stamp Set - Season of Friendship; Seasonal Sentiments (MDS)
Ink - Cherry Cobbler; Early Espresso; Baja Breeze
Card Stock - Whisper White; Baja Breeze; Candy Cane Christmas DSP
Other - Stickles (nonSU); My Digital Studio
Tuesday, December 7, 2010
Roofing Materials in the Stamp Room?
Over the last several months I have seen a lot of crafters posting photos of tealight holders made using the Snowflake die for the Big Shot and roof flashing. Initially, although I thought they were very pretty, I wasn't going to make any - I was pretty sure I would end up cutting myself. I did get in touch with a couple of people and they assured me that the cut edges were not sharp so I headed out to one of the local building material stores and bought a roll of the flashing.
I made five sets for my parents - each tealight holder uses two of the snowflakes. My sister cut out enough to make 10 sets. I have a bunch cut out and just have to put them together. Although the photo shows this set using battery operated tealights, they are safe to use with "real" candles. They are just so pretty when lit!
Monday, December 6, 2010
Jolly Holiday
I saw this card when I was browsing the internet a few days ago - unfortunately I didn't mark down the source. I will update my blog when I figure out where I saw it. I added a few dots with my white signo gel pen but otherwise it is a very close copy of the original.
This is the second card that I have prepared for Judy and I to make today. We ended up not getting to this card - we had a lot of catching up to do and only got to two of the planned cards.
Supplies
Stamps - A Cute Christmas; Short and Sweet
Ink - Cherry Cobbler; Cherry Cobbler, Pear Pizzazz and Old Olive Markers; Jet Black StazOn
Card Stock - Cherry Cobbler; Old Olive; Very Vanilla; Jolly Holiday DSP
Other - Old Olive 5/8" Satin Ribbon; Regals Button (Cherry Cobbler); Scallop Trim Border, 2 3/8" Scallop Circle and 1 3/4" circle punches; 1/2" corner rounder (non SU); dimensionals
Sunday, December 5, 2010
I "Built" a House
One of the benefits of being a Stampin' Up! demonstrator is the opportunity to pre-order items from upcoming catalogues and promotions. When the pre-order period for the Holiday Mini Catalogue opened on August 1 I ordered the Design-a-House. The house pieces are in the kit (along with that little brass door knob). The idea is to decorate and embellish as little or as much as you want. My house arrived, I put it on a shelf, took it out a couple of times and then finally a couple of days ago I decided I was going to do it! I have seen some that are much more elaborate and some that are a little simpler. Overall I am really pleased with my little house and am thinking of buying more before the catalogue sales period ends on January 3.
I used one of the patterns from the Deck the Halls DSP pack for the walls and added a few accents of soft suede. I knew I wanted a red door and roof. I put vellum behind the windows and although it doesn't show up in the photo the battery operated tealights inside give a really nice warm glow.
I added a few trees cut with a Sizzix die (non SU) and a cotton ball in the chimney. While looking through a cupboard I found the little Santa Claus and think he looks quite cute sliding down the roof!
Saturday, December 4, 2010
3D Ornament Card
This is one of the cards Judy and I will be making on Monday. I had seen it while browsing some of the posts on Stampin' Connection and knew that I wanted to make a few myself. You can link to the original HERE. The original had a layer of Crumb Cake card stock and one of the images had been stamped with Crumb Cake ink - I decided to stay with a red and white card.
I like the little bit of paper piercing in each of the corners and the three little pearls below the ornament. A fairly clean and simple card with a bit of a punch. You can't really tell in the photo, but the white card stock is the Stampin' Up! Shimmery White.
Supplies
Stamps - Tags til Christmas; All Holidays
Card Stock - Cherry Cobbler; Shimmery White
Ink - Cherry Cobbler
Other - Cherry Cobbler Seam Binding; Dimensionals; Basic Pearls; Gold Elastic Cord (retired); Ornament Punch; paper piercer; Mat Pack
Thursday, December 2, 2010
Another Frame
I really liked the frame I had made last month (HERE) and decided to make one using up some of the Sending Love Specialty papers from the 2010 Occasions Mini. I think it turned out really well - I ended up making two the same and I might make a third. They will make great gifts for parents of little girls.
Although the paper already has glitter accents, I also spritzed it with a solution of Frost White Shimmer paint and rubbing alcohol for some added shine. It is amazing how quickly these go together - a few pieces of paper, some ribbon, a brad and you are done.
Supplies
Paper - Sending Love Specialty Designer Series Paper (retired); Pink Pirouette (to cover the back)
Other - Crochet Lace trim; Sending Love Real Red Epoxy Brads (retired); Anywhere Glue Stick
Although the paper already has glitter accents, I also spritzed it with a solution of Frost White Shimmer paint and rubbing alcohol for some added shine. It is amazing how quickly these go together - a few pieces of paper, some ribbon, a brad and you are done.
Supplies
Paper - Sending Love Specialty Designer Series Paper (retired); Pink Pirouette (to cover the back)
Other - Crochet Lace trim; Sending Love Real Red Epoxy Brads (retired); Anywhere Glue Stick
Wednesday, December 1, 2010
Candy Cane Christmas
Last week Andrea Walford posted THIS card and although I do prefer more traditional colours for Christmas cards I really liked it. This was one of the cards Judy and I made on Monday afternoon when we got together.
We did change a few things - instead of using Basic Black ink for the greeting we used Pear Pizzaz. We also decided to have a bit more of the pink satin ribbon showing - you can hardly tell on Andrea's that there is any ribbon at all. We used some of the little felt flurries (available on the clearance rack) and retired pink epoxy brads.
Supplies
Stamps - Bells & Boughs
Ink - Pear Pizzazz
Card Stock - Gina K Luxury White 120 lb; Pear Pizzazz; Pretty in Pink; Whisper White; Candy Cane Christmas DSP
Other - Little Felt Flurries; Northern Frost Decorative Strip Die; Pink Epoxy Brads (retired); Square Lattice Embossing Folder; Scallop Oval Punch; Dimensionals; Pretty in Pink 5/8" satin ribbon
We did change a few things - instead of using Basic Black ink for the greeting we used Pear Pizzaz. We also decided to have a bit more of the pink satin ribbon showing - you can hardly tell on Andrea's that there is any ribbon at all. We used some of the little felt flurries (available on the clearance rack) and retired pink epoxy brads.
Supplies
Stamps - Bells & Boughs
Ink - Pear Pizzazz
Card Stock - Gina K Luxury White 120 lb; Pear Pizzazz; Pretty in Pink; Whisper White; Candy Cane Christmas DSP
Other - Little Felt Flurries; Northern Frost Decorative Strip Die; Pink Epoxy Brads (retired); Square Lattice Embossing Folder; Scallop Oval Punch; Dimensionals; Pretty in Pink 5/8" satin ribbon
Tuesday, November 30, 2010
Jolly Holiday and Peaceful Season
I love the simplicity of this card. I had seen THIS card and decided to change it a bit for Judy and I to make. I added some ribbon and a few coloured rhinestones. Judy had told me that the Basic Rhinestones could be coloured using Sharpie markers. I love them.
This is one of the cards Judy and I made yesterday afternoon.
Supplies
Stamps - Four the Holidays; Peaceful Season
Cardstock - Old Olive; Very Vanilla; Cherry Cobbler; Jolly Holiday DSP
Ink - Old Olive
Other - corner rounder; scallop trim border punch; cherry cobbler seam binding; basic rhinestones (coloured with red sharpie); paper piercer and mat pack
Monday, November 29, 2010
Holiday Stamp Camp - 7
This is another one of the projects from the Holiday Stamp Camp - it's a snowglobe! I love snowglobes and am glad I finally made this card. I hope to make a few more. That is water in there and it doesn't leak! You can see the glitter puddled like a snowbank under the snowman. It really swirls around like a blizzard when the card is shaken.
Supplies
Stamps - A Cute Christmas
Cardstock - Whisper White; Baja Breeze; Candy Cane Christmas DSP
Ink - Jet Black Sazon; various markers
Other - Circle Sweet Treats cups; Northern Frost decorative strip; rhinestones; dazzling diamonds; medium acetate sheet; silver tinsel trim
Sunday, November 28, 2010
Inspired by Andrea Walford
Judy and I had seen THIS card posted by Andrea Walford and really liked the colours and the layout. Unfortunately neither one of us is very fond of cutting out shapes - we love our punches! I sat down one morning and taking Andrea's layout made a card that was similar but used a punch. I was pleased with the result so used it as the third card for my play date with Judy last Tuesday.
We did two versions - one using Old Olive satin ribbon and one with Pear Pizzazz stitched poly ribbon.
Here it is with the Old Olive ribbon
This one uses the Pear Pizzazz ribbon.
Stamps - Four the Holidays
Ink - Cherry Cobbler
Cardstock - Pear Pizzazz; Very Vanilla; Old Olive; Jolly Holiday DSP
Other - Ornament Punch; Scallop Trim Border Punch; Ribbon; Dimensionals
Saturday, November 27, 2010
Holiday Stamp Camp - 6
I can't believe that I have still not completed all of the projects from the Holiday Stamp Camp hosted by Sherida Giddings and Trina St. Michael in September. I made this card with Judy on Tuesday.
The original had several spirals of snowflakes on the inside - we decided not to do that and just stamped a few snowflakes on the inside layer. This card really sparkles!
The vellum layer was embossed with the Northern Flurry embossing folder and was adhered to the base card with mini glue dots. We used the largest rhinestones to cover where the glue dots showed through. The "tag" is multi-layered. We used the decorative label punch and punched out one label from Whisper White and one from cardstock vellum. The vellum label was embossed using the Northern Flurry folder.
Supplies
Stamps - Holiday Happiness
Ink - Marina Mist
Cardstock - Marina Mist; Whisper White; Vellum Cardstock
Other - Basic Rhinestones; Marina Mist 5/8" Satin Ribbon; Northern Flurry Embossing Folder; Decorative Label Punch; Large Oval Punch;Scallop Oval Punch; Mini Glue Dots
Friday, November 26, 2010
Toolbox Gift Card Holder
Last week I saw a very unique giftcard holder while I was browsing the internet. It looks like a toolbox! I need something to package a gift card for my Dad's birthday so I decided that would be the one. I purchased the tutorial and started crafting.
Is it not the cutest thing!
Here is the view of the inside.
Is it not the cutest thing!
Here is the view of the inside.
You can see the original by clicking HERE.
Supplies
Card Stock - Real Red, Basic Black
Other - Clips Assortment, Basic Black Brads
Thursday, November 25, 2010
Motorcycle
My niece's fiancé will be celebrating a birthday soon so I decided to make him a card using the Motorcycle stamp from the SU Summer Mini catalogue. Too bad it did not carry over to the main catalogue.
The motorcycle was stamped using black craft ink and then heat embossed with black embossing powder. Before stamping the image I sponged the background using Poppy Parade, Pumpkin Pie, Daffodil Delight and Pear Pizzazz. The black panel was put through the big shot and the lattice embossing folder to add a little texture.
Supplies
Stamps - Motorcycle, Teeny Tiny Wishes
Card Stock - Poppy Parade, Basic Black, Very Vanilla, Love Letters DSP
Ink - Basic Black Craft, Basic Black Classic
Other - Black Embossing Powder, Designer Label Punch, 1" Circle Punch, Word Window Punch, Dimensionals, Basic Black Brads, Square Lattice Embossing Folder, Stampin' Sponges
The motorcycle was stamped using black craft ink and then heat embossed with black embossing powder. Before stamping the image I sponged the background using Poppy Parade, Pumpkin Pie, Daffodil Delight and Pear Pizzazz. The black panel was put through the big shot and the lattice embossing folder to add a little texture.
Supplies
Stamps - Motorcycle, Teeny Tiny Wishes
Card Stock - Poppy Parade, Basic Black, Very Vanilla, Love Letters DSP
Ink - Basic Black Craft, Basic Black Classic
Other - Black Embossing Powder, Designer Label Punch, 1" Circle Punch, Word Window Punch, Dimensionals, Basic Black Brads, Square Lattice Embossing Folder, Stampin' Sponges
Wednesday, November 24, 2010
Snowman
I have seen a lot of snowman cards this season, but this one really caught my attention. You can see the original HERE.
I changed the background from Crumbcake to Bajja Breeze and rather than using the Snowflake punch I used the Snowflake #12 sizzlit. Other than that it is all the same.
This is one of the cards Judy and I made on Tuesday when we got together for our weekly "play date".
Supplies
Stamp Set - Four the Holidays, Serene Snowflakes
Card Stock - Baja Breeze, Whisper White, Chocolate Chip, Pumpkin Pie
Ink - Baja Breeze, Night of Navy, Basic Black marker, Whisper White Craft
Other - Ribbon (retired), 2 1/2", 1 3/4" and 1 1/4" circle punches, Basic Black Brads, Dimensionals, Snowflake #12 Sizzlit
I changed the background from Crumbcake to Bajja Breeze and rather than using the Snowflake punch I used the Snowflake #12 sizzlit. Other than that it is all the same.
This is one of the cards Judy and I made on Tuesday when we got together for our weekly "play date".
Supplies
Stamp Set - Four the Holidays, Serene Snowflakes
Card Stock - Baja Breeze, Whisper White, Chocolate Chip, Pumpkin Pie
Ink - Baja Breeze, Night of Navy, Basic Black marker, Whisper White Craft
Other - Ribbon (retired), 2 1/2", 1 3/4" and 1 1/4" circle punches, Basic Black Brads, Dimensionals, Snowflake #12 Sizzlit
Tuesday, November 23, 2010
Candy Cane Christmas
A couple of weeks ago Becky Roberts posted a photo of projects from her Candy Cane Christmas Stamp Camp HERE. The card with the ornaments caught my attention and I decided to CASE it. I actually ended up making twelve of them! So many little bows and knots!
Supplies
Stamp Set - Tags til Christmas, Christmas Greetings
Card Stock - Baja Breeze, Real Red, Whisper White, Candy Cane Christmas DSP
Ink - Real Red
Punches - Ornament, Dotted Ribbon
Other - Silver Elastic Cord (retired), Basic Rhinestones, Tasteful Trim for the Big Shot, 1/4" Whisper White Grosgrain Ribbon, Dimensionals
Supplies
Stamp Set - Tags til Christmas, Christmas Greetings
Card Stock - Baja Breeze, Real Red, Whisper White, Candy Cane Christmas DSP
Ink - Real Red
Punches - Ornament, Dotted Ribbon
Other - Silver Elastic Cord (retired), Basic Rhinestones, Tasteful Trim for the Big Shot, 1/4" Whisper White Grosgrain Ribbon, Dimensionals
Monday, November 22, 2010
Deck the Halls - Day 7
This is the last of my posts (for now anyway) using the Deck the Halls DSP. I am still thinking of ordering more and maybe more of the musical cards.
Supplies
Stamps - Bells and Boughs
Ink - Cherry Cobbler, Gold Encore
Card Stock - Cherry Cobbler, Brushed Gold, Very Vanilla, Deck the Halls DSP
Other - Very Vanilla Seam Binding, Basic Pearls, Dimensionals, Scallop Oval punch
Supplies
Stamps - Bells and Boughs
Ink - Cherry Cobbler, Gold Encore
Card Stock - Cherry Cobbler, Brushed Gold, Very Vanilla, Deck the Halls DSP
Other - Very Vanilla Seam Binding, Basic Pearls, Dimensionals, Scallop Oval punch
Sunday, November 21, 2010
Deck the Halls - Day 6
Hope you are not tired of seeing the Deck the Halls DSP! This is the second standard sized card I made using papers from the Deck the Halls package. I love the pearls in the corners!
Supplies
Stamps - Bells and Boughs
Ink - Cherry Cobbler, Gold Encore
Card Stock - Cherry Cobbler, Brushed Gold, Very Vanilla, Deck the Halls DSP
Other - Always Artichoke Seam Binding, Basic Pearls, Decorative Label punch, dimensionals
Supplies
Stamps - Bells and Boughs
Ink - Cherry Cobbler, Gold Encore
Card Stock - Cherry Cobbler, Brushed Gold, Very Vanilla, Deck the Halls DSP
Other - Always Artichoke Seam Binding, Basic Pearls, Decorative Label punch, dimensionals
Subscribe to:
Posts (Atom)