Tuesday, October 12, 2010

Day 18 - Simply My Digital Studio Two

On this day we reviewed how to create a Blog Banner (Header) in MDS.  Although I had already been doing so since I purchased the program last year, it was great to have Heather review some little tips and tricks.

I hard already created and saved a file recently, so rather than starting a new file I just opened the existing one and added to it.  I ended up with a page containing three separate blog banners.  Once I saved the file in MDS I saved it in a picture format (jpg) to my hard drive.  I then opened it up in my photo editing software (3 separate times) and cropped the individual banners and saved them so that I can insert them into my blog when I want. 

Here they are on the one page (8 1/2 x 11)


Here they are after they have been cropped and saved individually.


Monday, October 11, 2010

Simply MDS - Day 17

The technique demonstrated on Day 17 was how to use a grosgrain bow as a "tab".  By carefully placing the bow and then strategically placing another object over it so that only a small portion is showing, the bow appears to be a little pull tab.

I decided to use a family photo as well as photos of my parents when they were first married and then from a few years ago.

You can see the little red tabs sticking out from behind the photos.  If this was a `real` page, the little tabs could be pulled to reveal a journal entry hidden behind the photo.

Sunday, October 10, 2010

Day 16 - My Digital Studio

Heather's sample on Day 16 of her class feature her son Mark on the day he played his first football game and he scored a touchdown.   She created a background to simulate a football field and then added her photos, embellishments and text.  I remembered that I had a few pictures from when we went to a Spring Training game between the Toronto Blue Jays and the New York Yankees at Legends Field in Tampa, Florida.  I did my best to recreate a baseball field and then built from there.  I am really happy with my page.  My nephew's face says it all - the Blue Jays did not have a very good game that day!


Saturday, October 9, 2010

Simply MDS 2 - Day 15 - Making a Movie

On Day 15 of her Simply My Digital Studio class Heather Summers demonstrated how to make a "movie" and add music and/or narration to our projects.  It was so easy!  I opened my project (I used my Simply MDS 2 project).  On the menu there is a Music and Narration button.  Selecting that brings up a page where you can then select music to add to the project.  I chose one song and choose the "loop" option.  This allows continuous play of the music while the pages are displayed one by one in a slidewhow.  There is an option to add a personal narration - I didn't select that option for this project (you can elect to do a narration for each page!).  Once that is completed there are just a few steps more to complete the "movie".  There is also an option to burn the project to a DVD.  How fun is that!  You could put together your scrapbook, set it to music, create DVD's and send them as lovely little gifts to family and friends.


Friday, October 8, 2010

Simply My Digital Studio - Day 14

This page went together so quickly - a few photo boxes, embellishments, a bit of text and it was done.   I created one text box - adjusted the size to what I wanted and then copied it multiple times.  I placed the boxes where I wanted them on the page and then filled some of them with photos.  I filled two of them with Designer Series Paper and the third with white cardstock.  I then added a text box over that and wrote in my journal entry.  I added a button and a ribbon knot on top of that.  I use the small photo corner punch for the upper left and lower right corners - filled them in with Daffodil Delight.  I used the Full Heart punch and increased the size - no problem with error messages if you increase the size before colour filling.  I filled it with Cherry Cobbler and added a text box over it.  A couple of buttons and a brad completed the top of the page.  The bottom scallop is a stamp from All Scallops.  I created it once using Cherry Cobbler and then copied it so go from left to right.  I added some whisper white brads in each of the scallops and then added two rows of white stitching.  Although there is a lot of white space, I resisted the temptation to fill the background with DSP or coloured card stock.  Although I like the look of the one photo in black and white with the rest in colour, I prefer the look when all but one of the photos is black and white.  The beauty of MDS is that you can alter it very quickly to ensure you have the exact look you want.

Thursday, October 7, 2010

Day 13 - My Digital Studio

I decided to do two version of the Day 13 layout.  Who knows - maybe one day I will print the pages and insert them into a scrapbook or perhaps I will create multiple pages and have them printed as a book.  Although there are quite a few elements on each of the pages, I am constantly amazed at how quickly the pages come together.  I used the same colour palette on both pages so they could be a two page layout in a scrapbook.


Wednesday, October 6, 2010

Day 12 - Heather Summers' Simply MDS 2

Day 12 of the class demonstrated how to make your own background paper using stamp sets.  Heather also showed how to effectively use alphabet stamps in a "random" pattern to create your title.  Another technique on this page was to change all but one of the photos to black and white (a feature withing the MDS program - easy as a mouse click).

Hope you like it.

Tuesday, October 5, 2010

Simply MDS 2 - Day 11

Day 11 of the online class demonstrated how to get the look of  "text wrapping" when creating a page.  Heather's sample was a photo of her canyoneering during her recent visit to Utah for the Stampin' Up! Founders Circle event.  She used a customized background paper - a cool feature in the program where you can select one of your own photos as the background.  She then added her text box and positioned it and arranged the text so that it wrapped around the centre image of the photo.

I did two versions of that layout - one using a photo of a painting my cousin my cousin did as a tribute to our grandparents.  It shows them "in the clouds" and below them are several of the landmarks near their home (including their house).  The other is a photo of a pelican hovering above the water.  My friend Debbie snapped the photo when we were together in Florida in 2009.  I just love how his shadow is so clear in the water below.


Monday, October 4, 2010

CIBC Run for the Cure

Two of my sisters, my niece and her 4 year old daughter participated in the CIBC Run for the Cure here in Ottawa yesterday.  I made a card for my grand-niece congratulating her for participating.  Initially I was not sure what I was going to do and reached out to Heather Summers for ideas.  Being the wonderful person she is, she did offer up some great suggestions.  One of those was to use the little girl stamp from the Build-a-Bear collection.  I don't have the stamp but it did get me to thinking - I have the Build-a-Bear die!  I decided to use that. 

I used the die to cut the bear figure in Creamy Caramel with a little Close to Cocoa accent on the face (both retired colours).  I also placed a punched circle of black behind the head so it would show through for the eyes, nose and mouth.  I used the Beary Essentials die to cut out her clothes (the jacket and pants are Pretty in Pink; the shirt is Pretty in Pink DSP and her little shoes are Whisper White).  The bow on her head was cut using the Beary Girl sizzlit - I decorated it with a small rhinestone jewel.  The button on her jacket is a 3/4" circle.  I made the ribbon of hope by die cutting the '&' from a nonSU numbers die and then trimming the ends to look like a ribbon.  I used a tiny rhinestone in the centre.

The background is sponged with Garden Green, Bashful Blue and Not Quite Navy.  I used the scallop circle punch as a mask so that there would be clouds in the sky.  I adhered the bear using dimensionals.

I stamped and trimmed the banner before sponging the edges with Pretty in Pink ink.  Before adhering it to the card I curled it a bit and then attached it with dimensionals.

I also made a little 'medal' for her.  I created the image panel in My Digital Studio, printed it, cut it out with the clear circle die and then attached it to the Pretty in Pink scallop circle.  I decorated it with a few of the rhinestone jewels and added the ribbon.  The other side of the medal is identical.

Day 10 - Simply My Digital Studio Two

On day 10 of the class Heather didn't give us a completed page to view - she did a sketch of a 12 x 12 layout and challenged the participants to create and post their own creation.  I was intrigued with the layout but initially wasn't sure where to start or what to do.  I like to see a completed sample and take inspiration from that.

I decided that I wanted to use some photos of my oldest son.  As I was selecting the photos to use I came across a photo of a sunset at the beach in St. Petersburg, Florida that he had taken several years ago when we were there for Christmas.  I decided to use that as the focal image and then surround it with the photos of him.  In Heather's sketch there was a circular photo box within the large circle - I decided not to use that.  Rather than filling the background with a solid colour or DSP, I chose a distressed pattern that I think works well filling in the white space without taking away from the page elements.


It is really amazing how quickly a page comes together in MDS.  You can quickly change any of the elements - background papers, photos, stamps.  I love it and I don't consider myself to be a scrapbooker at all.

Sunday, October 3, 2010

Simply My Digital Studio - Day 9

The ninth day of the class (September 18) demonstrated how MDS can be used as a tool to design projects that can later be recreated using paper, stamps and ink or can be printed on cardstock and then cut out and embellished.

I decided to use mine as a design tool and I will be recreating these Christmas Tags using Stampin' Up! products.

Saturday, October 2, 2010

Day 8 - Simply My Digital Studio Two

Day 8 saw us making a "collage" page.  We created a page that was partially filled with 2" photo boxes.  Added the photos, a bit of background paper, embellishments and a few stamps and were done.

I decided to "scrap" some of the photos from a trip my sister took a few years ago.  She hasn't yet done her scrapbook so maybe seeing this will get her going on that.

Friday, October 1, 2010

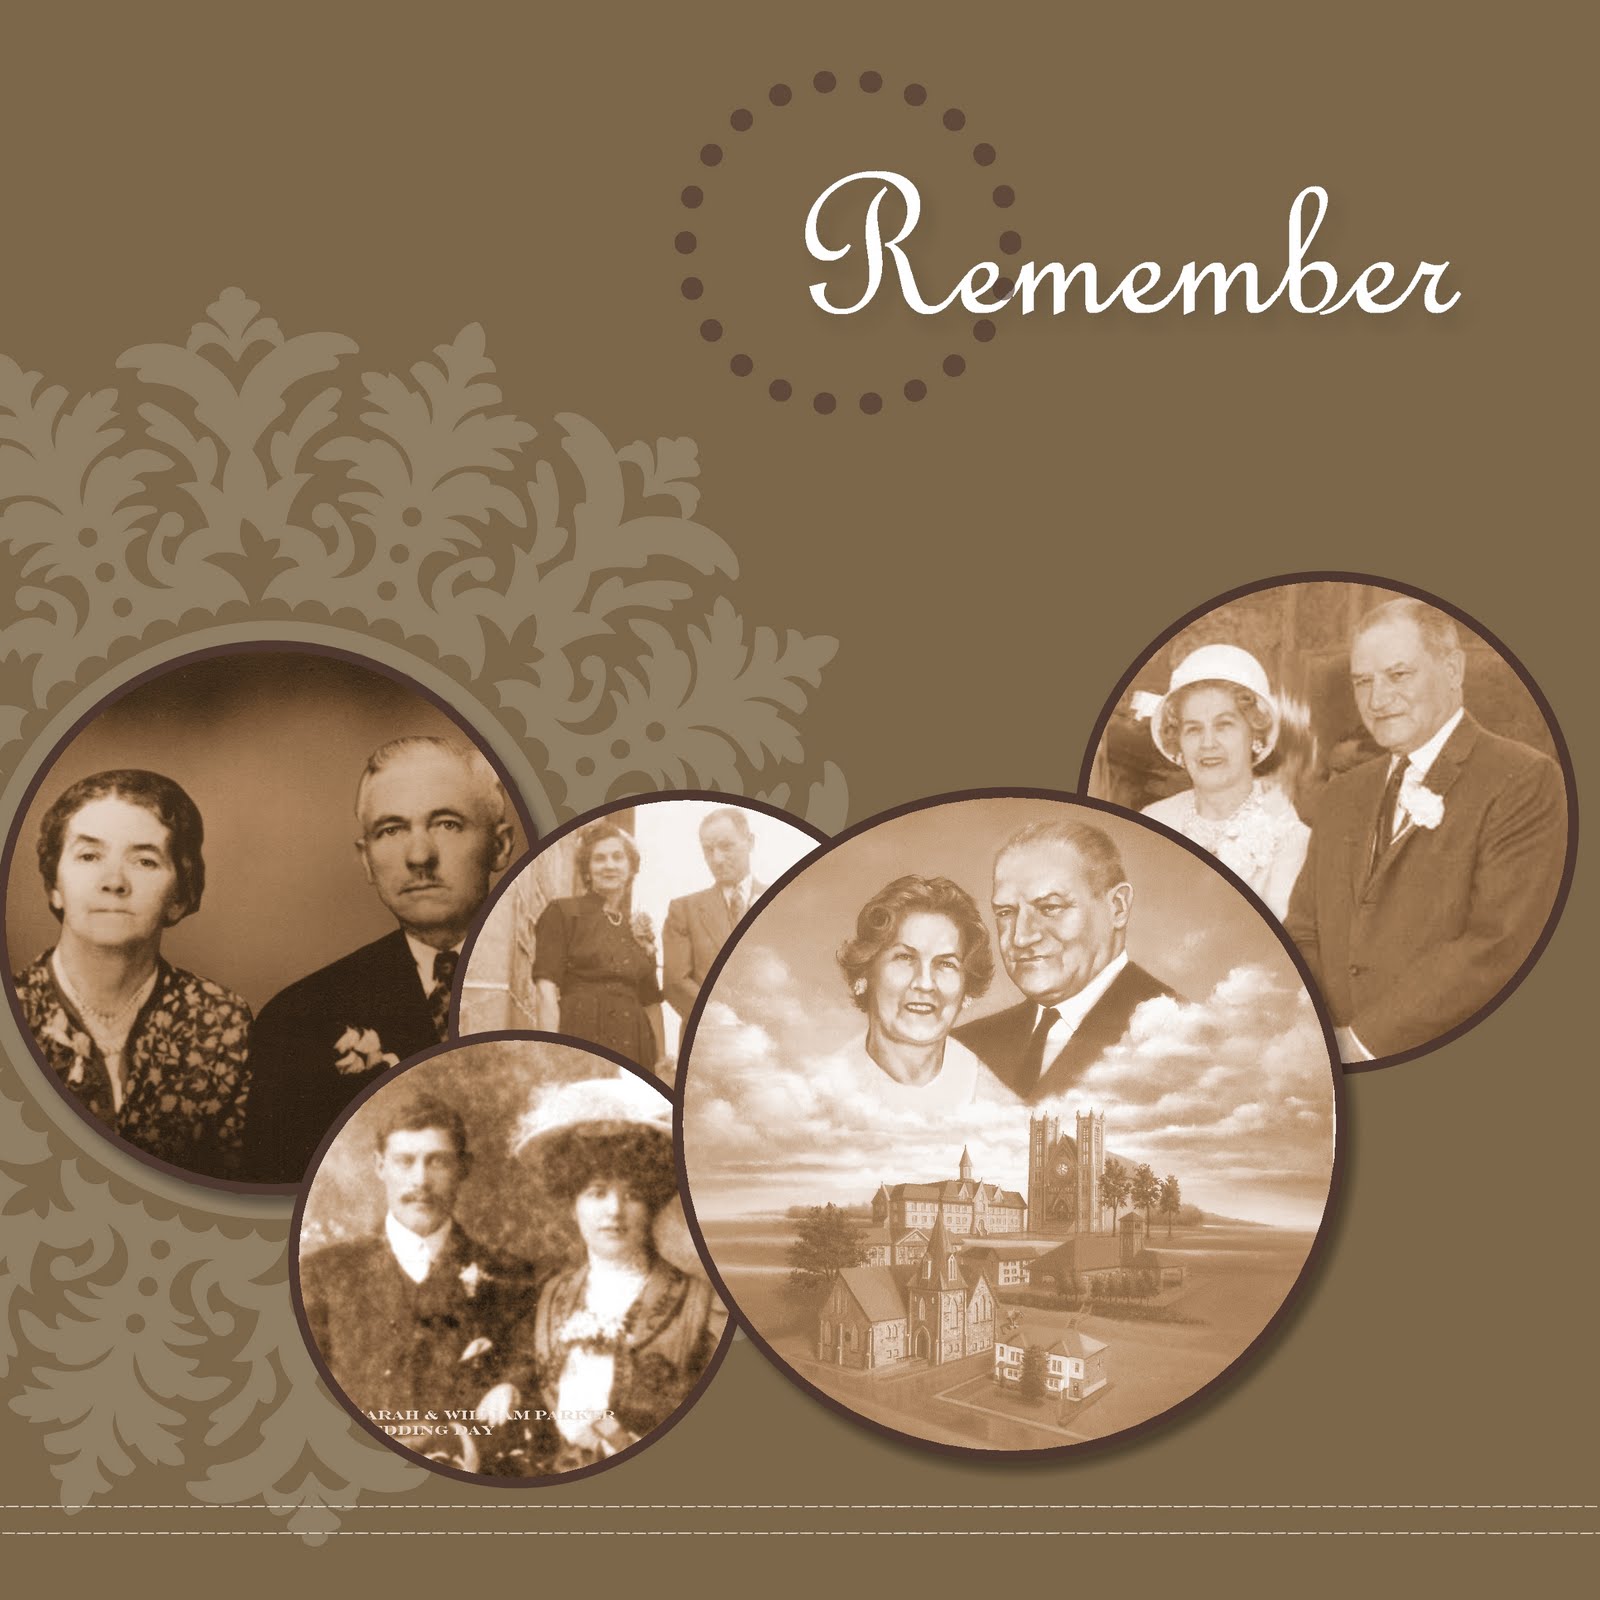
Simply MDS - Day 7

Day 7 of the class demonstrated how you can very quickly put together a page (or even a multi-page project) by selecting one of the templates included with My Digital Studio and bringing in your own photos.  For my page I selected a template that only had one page.  Although the template only included one round photo box with several circles filled with DSP I decided to change it up to have all round photo boxes.  I also moved the "Remember" from the bottom left had corner to the upper right corner and added the dotted circle stamp.  In addition, I chose the option to change the photos to a sepia effect.

Thursday, September 30, 2010

Simply MDS 2 - Day 6

Day 6 had us doing "punch art" in My Digital Studio.   If you follow Heather's blog you are aware that she loves using her punches and has done a couple of online Simply Punches classes.  On this project we combined several punches to create a fire hydrant and then added the scottie dog stamp.  It was a lot of fun to do.  We did it as a 5 1/2" x 4 1/4" project, so if I want I can print it onto card stock and I will have a little greeting card.  Great fun

Wednesday, September 29, 2010

My Digital Studio - Day 5

The fifth day of the class highlighted how easily a page can come together by adding a few punches and filling them with DSP.  For this page we used the square punch and changed the size to make rectangles.  They were filled with DSP and then the heart punches were added and filled with DSP to match.  Add a few little shadows, photo boxes, text and embellishments and the page was done.  It literally only took a few minutes.

Tuesday, September 28, 2010

Simply My Digital Studio - Day 4

On the fourth day of the class we created projects, saved them as jpg files and then printed them onto iron on transfer paper.  Heather's example was ironed onto a baby's T-Shirt.  I decided that I would make myself a custom tote bag.  My camera is not working properly right now and I don't have my new one yet so I don't have a photo of the completed bag yet.

I created the images in MDS, printed them onto the transfer paper (being careful to print them as mirror images because I was using text), cut them apart and then ironed them onto the large canvas bag that I purchased at Michael's (with my coupon of course!).

These are the images I used -

Monday, September 27, 2010

Day 3 - MDS

The third day of Heather's Simply MDS Two class demonstrated how to change a photo box to a circle.  How fun is that!  We also did some colour matching, changing the opacity of some elements and even creating our own customized DSP.

Sunday, September 26, 2010

Day 2 - My Digital Studio

Day 2 of the class demonstrated how to incorporate various elements available within MDS.  On this page we used stitches, punches, borders, stamps and of course photo boxes.  We were able to do some colour matching - for example some of the colours in the "stamped" stars were matched to colours within the photos.  A great way to coordinate your pages.  Day 2 also demonstrated that it is OK to have lots of white space on your page.

Saturday, September 25, 2010

Happy Birthday

I celebrated my birthday a few days ago.  One of the celebrations was with Judy and her husband Wayne.  On Monday we went out for a lovely lunch and then went back to Judy's for some cake and crafting - digital crafting.  The cake was wonderful.  We are able to purchase "cakelets" in some of our local stores.  They are from a bakery in Toronto - Dufflet?  Absolutely the perfect size for a small group.

Monday was the day I took my laptop with me and we did a scrapbook page using My Digital Studio.  I will not share Judy's page with you as I will only post pages and photos of my own family members after getting permission.  We used photos of Judy's little grandson and used the layout from Day 1 of Heather Summers' Simply My Digital Studio Two online class - posted yesterday.

I will post a picture of the birthday card Judy made for me.  I am going to have to CASE it for sure!  I love it.  I am not sure, but I think the card stock and ink may be the retired Cool Caribbean.  I love the dew drop in the centre of the medallion.

Thanks Judy!

Friday, September 24, 2010

My Digital Studio

Heather Summers is hosting a 20 day online class for My Digital Studio.  I had participated in her first class and quickly signed up for the second one.  On the first day of this class Heather demonstrated how easy it is to customize one of the "pre-packaged" photo layouts to make it your own.

We selected the option that had nine photo boxes already placed on the page.  By simply removing 2 of the boxes a blank space was available to fill with a text box.  I also created text boxes at the top and bottom of the page - filled in my text, filled the photo boxes, added a few embellishments and I was almost done.  I did add a background paper but using functions in the program I reduced the opacity so it was a little more subdued.


It is not too late to sign up for the class - it is online and you go through each of the classes on your own schedule.  There is one project posted each day - a video as well as a downloadable PDF file - and it will be available online until the end of October.  PLUS the class fee includes a DVD.  Heather is going to create a DVD that will include all of the videos, PDF's and photos.  She will be sending a copy to all of the class participants.  Check our Heather's blog HERE for more information.

The My Digital Studio program doesn't come with any fonts, but any fonts you have on your computer are picked up by the program.  There are a lot of free fonts available on the internet that can be downloaded quickly.  The font I used is Diggs my Hart - a favourite of mine.

On Monday when I went over to Judy's for our weekly "play date" I brought my laptop and we played with the My Digital Studio program.  Judy has the most darling grandson and we used photos of him to create some pages. 

Thursday, September 23, 2010

Marie Kirkwood's All Time Favourite Christmas Card Swap

For my second card I decided to use Dasher.  It is a great stamp and I have used it quite a bit.  This time I followed the layout for the "Olive the Other Reindeer" card that I posted HERE.

I decided to change up the colours of the reindeer and ribbon.  I love the ribbon, but unfortunately it is now retired.


Supplies
Stamps - Dasher; Four the Holidays
Card Stock - Confetti White; Real Red
Ink - Chocolate Chip; Real Red
Other - Real Red 1/4" Taffeta Ribbon; Retired SU Ribbon

Tuesday, September 21, 2010

All Time Favourite Christmas Card Swap

Again this year Marie Kirkwood is hosting a swap featuring Christmas stamps.  I signed up for 2 spots - I have to make 2 sets of 12 card fronts.

My most favourite christmas stamp is not from Stampin' Up! so I couldn't use it for this swap.   That stamp is a wonderful Santa face.  In the new Holidy Mini catalogue there is a set - Jolly Old Saint Nick - with a very nice Santa face so I decided to use that for my first set of 12 cards.  I used a card featured in the mini for my inspiration.


Supplies
Stamps - Jolly Old Saint Nick
Card Stock - Baja Breeze; Real Red; Shimmery White; Candy Cane Christmas DSP
Ink - Black StazOn; Real Red, Sahara Sand and Blush Blossom markers
Other - Real Red 5/8 Satin Ribbon

Sunday, September 19, 2010

Simply August Thank You - Day 5 Take Two

After making the Day 5 project using Tree Trimmings I remembered that I do have a stamp set with mittens.  It has been retired for quite some time but I am glad I still have it.  I pulled it out and although I had to change the dimensions of the focal image a little bit I got my card made.  I decided to use Real Red brads as the "pegs" for hanging the mittens - I usually hoard my embellishments and just didn't want to tuck into the Vintage Trinkets for a second time in one day.  Heather had used the "Merry Christmas" stamp from Teeny Tiny Wishes for her greeting.  My image panel was not as tall as Heather's so I decided to use a stamp from Heard from the Heart.

Hope you like the card!


Supplies
Stamps - Heard from the Heart; Bundle Up (retired)
Card Stock - Crumb Cake; Marina Mist; Very Vanilla
Ink - Real Red; Old Olive; Marina Mist; Chocolate Chip marker
Other - Real Red brads; Dimensionals; Stamp-a-ma-jig

Friday, September 17, 2010

Simply August Thank You - Day 5

Heather's project on the final day of her Simply August Thank You class was a Christmas card featuring the Jolly Bingo Bits stamp set on page 28 of the Holiday Mini Catalogue.  She used the little mittens and stamped it 3 times in different colours.  She then drew in the strings and had them "hanging" from the little brads in the Vintage Trinkets package.

I don't have the stamp set so I decided to take the look of the card and use my Tree Trimmings stamp set.  I stamped the images, drew in "strings" and hung them using the vintage brads.


Supplies
Stamp Set - Tree Trimming; Short & Sweet
Card Stock - Very Vanilla; Real Red; Old Olive
Ink - Real Red; Old Olive; Baha Breeze; Real Red marker; Basic Black marker
Other - Dimensionals; Vintage Trinkets; Stamp-a-ma-jig

Wednesday, September 15, 2010

Simply August Thank You - Day 4

Day 4 of Heather Summers' Simply August Thank You class featured a card with ruffled fabric.  The Holiday Mini catalogue has two packages of fabric to choose from.  Heather chose to feature the striped fabric from the Candy Cane Lane package.  As I don't have the fabric or the stamp set (A Cute Christmas) I decided to make some substitutes.  I used the retired 1" Double Stitched Real Ribbon and the Santa face from Jolly Old Saint Nick.

Although I found the ribbon ended up being quite bulky (I probably should have used some of the wide striped ribbon) I am quite pleased with my card.


Supplies
Stamps - Jolly Old Saint Nick
Card Stock - Garde Green; Blushing Bride; Candy Cane Lane DSP; Shimmery White; Real Red
Ink - Basic Black; Jet Black StazOn; Blush Blossom, Real Red and Pretty in Pink markers
Other - Button (Regals); Ribbon - 1" Real Red Double Stitched (retired), 5/8" Real Red Satin, 1/8" Real Red Taffeta; Sticky Strip; Dimensionals; Glue Dots; 1 3/4" Circle and 2 3/8" Scallop Circle; Signo White Gel Pen

Monday, September 13, 2010

Simply August Thank You - Day 3

On day 3 of the class Heather demonstrated the sponged background technique.  Her project was a Halloween card and she used Rich Razzleberry and Elegant Eggplant to create a beautiful (kind of spooky) background.  I decided not to go with the Halloween theme when I saw a card posted by Liz Goldhawk - it is the second card in her post HERE.

I'm really pleased with my card, but I have to figure out where to put a sentiment.  I may use a small greeting from Tiny Tags, punch it out with the Jewelry Tag punch and hang it from the ribbon with some thread.  For now I like it just as it is.

This is one of the cards Judy and I will be making when we get together this afternoon.

 Supplies
Stamp Set - Just Believe
Card Stock - Basic Black; Poppy Parade; Whisper White
Ink - Poppy Parade; Peach Parfait; Daffodil Delight; Pear Pizzazz; Basic Black Craft
Other - 3/8" Daffodil Delight Taffeta Ribbon; Elegant Lines Embossing Folder; Black Embossing Powder; Dimensionals; Stampin' Sponges

Saturday, September 11, 2010

Aviary - Inspired by Heather Summers

The second card Judy and I made this week was CASEd from one of the cards Heather Summers presented at convention in July.  You can see the card HERE.  Scroll down a bit - it is the second card in the post that I used for inspiration.   Heather's card is a fun fold card with a dimensions of 4 1/4 x 4 1/4 when closed.  I decided to adapt it to a standard size card.


Supplies
Stamps - Aviary; Teeny Tiny Wishes
Card Stock - Old Olive; Rich Razzleberry; Pacific Point DSP
Ink - Rich Razzleberry; Pacific Point; Tempting Turquoise; Old Olive; Basic Black
Other - Dotted Ribbon, Modern Label and Word Window punches; dimensionals

The third card Judy I made using the Aviary stamp set is one that I have posted before. Click HERE to have a look. This was one of the cards I made following Heather Summer's Aviary Class.

Thursday, September 9, 2010

Aviary

This week Judy and I made a few cards using the very cute Aviary stamp set.  This is the firstof the three cards we made.  I had seen the card on Stampin' Connection but unfortunately I can't link to the post - it was posted by Kelly J. Birrell.

 
Stamp Sets - Aviary; Teeny Tiny Wishes
Card Stock - Early Espresso; Pear Pizzazz; Peach Parfait; Poppy Parade
Ink - Early Espresso; Pear Pizzaz; Peach Parfait; Poppy Parade; Basic Black
Other - Boho Blossoms, Modern Label, Large Oval and Itty Bitty punches; Dimensionals; brad

Tuesday, September 7, 2010

Simply August Thank You - Day 2

The second day of the class featured Tart and Tangy and the A-Z stamp sets.  The card is a 4 1/4 x 4 1/4 card.  It would be great a little card in a child's lunch box or to enclose with a teacher gift.


Supplies
Stamps - Tart and Tangy; A - Z
Card Stock - Cherry Cobbler; Whisper White
Ink - Chocolate Chip; Cherry Cobbler
Other - Linen Thread; Regals Button
Technique - Masking

Sunday, September 5, 2010

Simply August Thank You - Faux Candles

Heather Summers has again invited me to participate in her Simply August Thank You online class.  On the first day Heather featured a set of three "candles" made of Designer Series Paper.  Inside the tubes there are battery operated candles.  Too bad that doesn't show through on the photo, but when the lights are dimmed they are so pretty.  Heather's sample had a Halloween theme, I decided to make mine for Christmas.

Hope you like them.


Supplies
Card Stock - Candy Cane Christmas DSP; Real Red; Old Olive
Other - Scallop Square die; Tasteful Trim die; nonSU Poinsettias; battery operated Tealight Candles

Friday, September 3, 2010

Pocket Silhouettes

A few weeks ago I saw THIS card while exploring some blogs that I had never visited before.  I bookmarked it thinking it would be a great little project for Judy and I.  So along with the cards I posted earlier this week, we each made one of these.  I love how the little rhinestones add a little something extra to the black silhouettes.


Supplies
Stamp Set - Pocket Silhouettes
Card Stock - Barely Banana (retired); Certainly Celery; Rose Red; Regal Rose; Whisper White
Other - 5/8" Certainly Celery Satin Ribbon; Rhinestones (from the retired Eggcellent Eggs Kit); Scallop Trim Border Punch

Wednesday, September 1, 2010

Quick Post

This week Judy and I had our usual "playdate" and made a few very quick cards.  I had received a little note card from Veronica Jamieson, a fellow Stampin' Up! demonstrator, and decided that we would CASE that card.  It was an opportunity to use of some of the Fresh-Cut notes I had on hand as well as some of my retired felt flowers. 

We each made four cards - 2 with a pink background in the and 2 with chocolate chip.


Supplies
Stamp Set - Fresh Cuts
Card Stock - Chocolate Chip; Pink Pirouette
Ink - Chocolate Chip
Other - Fresh-Cut Notes; Felt Flowers (retired); Brads

Saturday, August 28, 2010

Taking a Break

I am going to take a little break from my blog for a few days while I work on my submissions for a swap I signed on for.  I am also working on wedding invitations for my niece.

Keep checking in - I'll be back soon.

Marjorie

Aviary 4

This is the last of the cards from Heather Summers' Aviary class.  I don't think I had said in the earlier posts that most of the colours used in this class are from the Brights collection.  This card features a bow made from the fabulous 1/2" Stitched-Poly Ribbon only available in the InColours collection.


Friday, August 27, 2010

Aviary 3

Today's post is the set of 3 x 3 notecards in the little matchbook folder from Heather Summers' Aviary Class.

This first photo shows the matchbook folder on it's own - the little cards are inside.  You don't have to look too closely to see that I slipped up with my punched scallop border.  I guess I will just have to keep it for myself!


Here is a photo of the set.  Hope you like them.

Thursday, August 26, 2010

2 Step Owl Punch

I am so happy I let myself buy the 2 Step Owl punch.  It is so fun and cute.  This week Judy and I made Post It note covers and decorated them with owls.  Just too cute!

The scallop circle is adhered with dimensionals and overlaps the flap on the right hand side to keep the package closed.  I thought about doing more decorating, but decided to stop so that the little owl is the centre of attention.


Here it is open


Supplies
Card Stock - Chocolate Chip; Daffodil Delight; Old Olive; More Mustard; Close to Cocoa (retired); Whisper White; Pear Pizzazz DSP (from Hostess Level I paper pack)
Ink - More Mustard; Close to Cocoa (retired)
Other - 2 Step Owl Punch; 2 Step Bird Punch; 2 Way Glue pen; sponge daubers; dimensionals

Wednesday, August 25, 2010

Aviary - 2

This is the second of three standard size cards in Heather Summers' Aviary class.  This one hold a couple of surprises.  Although a standard size, the card is like a matchbook.  The card is scored and folded at the bottom so that the front of the card slides into and is held by the "tab" created at the bottom.  In addition, the image panel on the front opens up too!  How cute is that!


See the pink striped section at the bottom - the front of the card slides into that!  But there is even more fun - that cute little flower brad is keeping the "mini card" on the front closed!

Take a look

Tuesday, August 24, 2010

Another Advent Calendar

This is the 4th advent calendar that I have made.  I used retired SU Designer Series Paper and some nonSU embellishments.

Monday, August 23, 2010

Aviary

When I first saw the stamp set Aviary in the 2010 Stampin' Up! catalogue I thought it was cute but didn't even think of putting it on my extensive wish list.  It became obvious in a very short time period that I was going to "need" this stamp set.  I signed up for Heather Summers' Aviary class - she so very kindly does a kit to go as we don't live in the same city.  The class fee included the stamp set!  How fun is that! 

My kit arrived last week and I quickly got the cards done - everything was cut and stamped.  I just had to punch a few pieces.  The kit included all the supplies for 4 projects - three standard size cards and one little card set that included 3 little notecards and a matchbook cover to hold them in.

This is the first of the cards.  I'll post the rest of them over the course of the week.

Sunday, August 22, 2010

Dasher in Silver

Last Monday Judy and I made two different cards using our Dasher stamps.  The one I posted yesterday was a little bit rustic but today's card is a little more "glitzy" using silver and red satin.

We used brushed silver card stock and embossed it with the Square Lattice embossing folder.   We added a strip of real red that was scalloped using the Scallop Trim Border punch and then we used my homemade bowmaker (I used pieces from my son's KNex toy) we made lovely red satin bows to tie around it and adhered that panel to the bottom of a plain white card base.  We stamped Dasher onto Whisper White using silver pigment ink and heat embossed it with clear embossing powder.  Layered that onto a piece of brushed silver and then real red.  Adhered that panel to the card with dimensionals.

Supplies
Stamp Set - Dasher
Card Stock - Whisper White, Real Red, Brushed Silver, NonSU 120lb white cardstock (base card)
Ink - Silver pigment ink
Other - Clear embossing powder, 5/8" Real Red Satin Ribbon, dimensionals, Scallop Trim Border punch; Square Lattice Embossing folder

Note - instead of using silver ink pigment with clear embossing powder you could use Versamark with silver embossing powder or silver pigment ink with silver embossing powder

Saturday, August 21, 2010

Olive The Other Reindeer

Bad joke I know but I couldn't resist. After I had finished all of my Christmas cards last year I saw a card on Splitcoaststampers that I really liked. I bookmarked it and pulled it up last week. Although it does use retired ribbon and a retired button I liked it and wanted to recreate it. My card is basically the same but I added a layer and a bow. The original card featured shimmer mist but I decided not to use it. You can see the original on Splitcoaststampers by clicking HERE.   I ended up using it as one of the projects for Judy and I to do together at the beginning of the week.

So here is "Olive The Other Reindeer"


Supplies:
Stamp Set - Dasher; Four the Holidays
Card Stock - Old Olive; Real Red; Confetti White
Ink - Old Olive; Real Red and Old Olive markers
Accessories - Linen Thread; Dimensionals; Sleigh Bells Ribbon (retired - 2009 Holiday Mini); Real Red Button (retired)

Friday, August 20, 2010

Just Believe

I just recently received my Just Believe stamp set and now have made my first card using it.  It is pretty much a direct copy of Gretchen Barron's card seen HERE.  CASEing this card was big for me.  I usually hoard my embellishments but on this card I have used a lot of pearls - there are 20 of them!!!. 

Grretchen used a new punch that will be available when the Holiday Mini goes live on September 1.  I didn't include it in my preorder (one of the benefits of being a demonstrator) but I do have the Lots of Tags Sizzlits and there was one that was just perfect.

I coloured the stamp using markers and then stamped it onto the Whisper White cardstock.   I then put it through the Big Shot using the Finial Press Embossing folder.


Supplies
Stamp Set - Just Believe
Card Stock - Old Olive, Elegant Eggplant, Whisper White
Ink - Old Olive and Elegant Eggplant Markers
Accessories - Old Olive 5/8" Satin Ribbon, Basic Pearls, Dimensionals
Punches - Scallop Trim Border, Scallop Trim Corner, Wide Oval
Other - Finial Press Embossing Folder, Beautiful Wings Embosslit, Lots of Tags Sizzlits

Hope you like it.  Have a great day!

Thursday, August 19, 2010

Another Advent Calendar

I have now finished the 3rd of my Christmas Advent Calendars.  This time I used the retired Ski Slope Designer Series Paper.


I just looked closely at the picture and saw that my Simply Adorned Charm is in the picture.  My photo tent is packed away right now and I was using the lamp on my craft table.  I have my charm hanging on the lamp to remind me to make more inserts.

Thanks for stopping by today.

Wednesday, August 18, 2010

Contempo Christmas 5

This card measures 4 1/4" x 4 1/4".  Again, it is the same layout as one of the cards in the Contempo Christmas class offered by Heather Summers in July.  On this sample I have again substituted Real Red cardstock and Dashing DSP (retired) for the Cherry Cobbler and Jolly Holiday Heather used.  The Real Red layer has been pierced.   I'll be back in a few days to post the cards using the supplies that came with the class to go kit.


Thanks for stopping in.  Have a great day!

Tuesday, August 17, 2010

Artistic Etchings - Anniversary

My brother-in-law and sister-in-law will be celebrating their 43rd wedding anniversary in a little over a week from now.  I knew I wanted to make a card for them using Artistic Etchings.  A few years ago they travelled to France and spoke often about their tour of the Eiffel Tower.  I wasn't sure of colours, layout or embellishments to use.  I have made a few cards using this set and any of them would suit the occasion perfectly.  One day while browsing through the posts on Stampin' Connection I saw a card that I knew would be perfect.  You can see the original by clicking HERE.  I loved the layout but I also knew that I would not be cutting out the tower.

Here is my card.  I wanted to put an anniversary sentiment on the front but thought it would get too busy so I just used the "Love" sentiment from Tiny Tags and punched it out with the Jewelry Tag Punch.  I also punched out tags in Basic Black and Cherry Cobbler.  The three tags are pinned to the bow using one of the pins in the Vintage Trinkets collection. 


Supplies
Stamp Set - Artistic Etchings; Tiny Tags
Card Stock - Basic Black; Cherry Cobbler; Whisper White
Ink - Basic Black Classic Ink Pad and Marker
Other - Vintage Trinkets; 1 1/4" Basic Black Striped Ribbon; Top Note Die; Oval Nestabilities; Dimensionals; Colour Spritzer Tool; Vintage Wallpaper Embossing Folder; Signo White Gel Pen

Monday, August 16, 2010

Contempo Christmas 4

This another of the cards from Heather Summers' Contempo Christmas class.   Although I followed the layout, I substituted some of the cardstock and DSP.  Rather than using Cherry Cobbler and Jolly Holiday, I decided to use Real Red and the retired Dashing DSP.

It is hard to see in the photo but the Very Vanilla base card has been dry embossed using the Petals-a-Plenty embossing folder.

Sunday, August 15, 2010

Elements of Style - Anniversary

My parents recently celebrated their 59th Wedding Anniversary. I had seen many vintage looking cards using the Elements of Style stamp set along with the Beautiful Butterflies die for the Big Shot and although I do like the vintage look, I don't like it to have lots of tears, etc.

I finally put together a card that I was happy with. I ended up not using any distressing other than sponging the edges of the layers. I had thought about colouring in the flowers behind the sentiment, but in the end I preferred to have the colour only on the butterfly.

I almost forgot that I had the Vanilla Hodgepodge. I lightly sponged it with Early Espresso.  I also used some of the new Basic Pearls for the "body" of the butterfly.  I hadn't realized when I ordered them that there were "strings" of pearls so I didn't have to adhere them individually.

Hope you like the card.


Supplies
Stamp Set - Elements of Style; Teeny Tiny Wishes
Card Stock - Early Espresso; Crumb Cake; Very Vanilla; Watercolour Paper
Ink - Jet Black StazOn; Crumb Cake; Early Espresso
Other - Very Vanilla 5/8" Satin Ribbon; Vanilla Hodgepodge; Beautiful Butterflies Die for the Big Shot; Basic Pearls; Dimensionals; Designer Label Punch

Thanks for stopping by and have a great Sunday!